Google Tag Manager (GTM) is a powerful, free tool that acts as a central hub for managing and deploying all the “tags” on your website or mobile app without requiring you to manually edit your website’s code for each change.
Here’s a breakdown of how it works and its key components:
The Core Problem GTM Solves:
Before GTM, if you wanted to track something on your website (e.g., a button click, a form submission, or a conversion), you’d typically have to:
- Get a “tag” (a snippet of JavaScript code) from the analytics or marketing platform (e.g., Google Analytics, Google Ads, Facebook Pixel, etc.).
- Manually insert this code into the HTML of your website’s pages, often requiring a developer.
- Repeat this process for every new tracking need or whenever a tag needed updating.
This was inefficient, prone to errors, and created a heavy reliance on developers for marketing and analytics changes.
How GTM Simplifies It:
GTM introduces a layer of abstraction. Instead of putting individual tags directly on your website, you place one GTM “container snippet” on every page of your site. This snippet is essentially a bridge that allows your website to communicate with the GTM servers.
Once the GTM container is installed, you manage all your tags, triggers, and variables through GTM’s user-friendly web interface.
Key Components of GTM:
- Container: This is the overarching entity in GTM. You typically have one container per website or app. It holds all your tags, triggers, and variables.
- Tags: These are the actual snippets of code that send data to various platforms. Examples include:
- Google Analytics (GA4) Configuration Tag
- Google Analytics (GA4) Event Tag
- Google Ads Conversion Tracking Tag
- Facebook Pixel
- Custom HTML tags (for any other script)
- Many built-in templates for third-party tools.
- Triggers: Triggers define when a tag should fire. They listen for specific events on your website. Examples include:
- Page View: Fires when a page loads (e.g., all pages, or specific pages like a “thank you” page).
- Click: Fires when a user clicks on a specific element (e.g., a button, a link).
- Form Submission: Fires when a form is successfully submitted.
- Scroll Depth: Fires when a user scrolls a certain percentage down the page.
- Video Engagement: Fires based on video plays, pauses, completion, etc.
- Custom Events: You can define your own custom events in your website’s code and then use them as triggers in GTM.
- Variables: Variables are placeholders for values that can change. They allow you to capture dynamic information from your website and use it in your tags and triggers. Examples include:
- Page URL: The URL of the current page.
- Click Text: The text of a clicked element.
- Form ID: The ID of a submitted form.
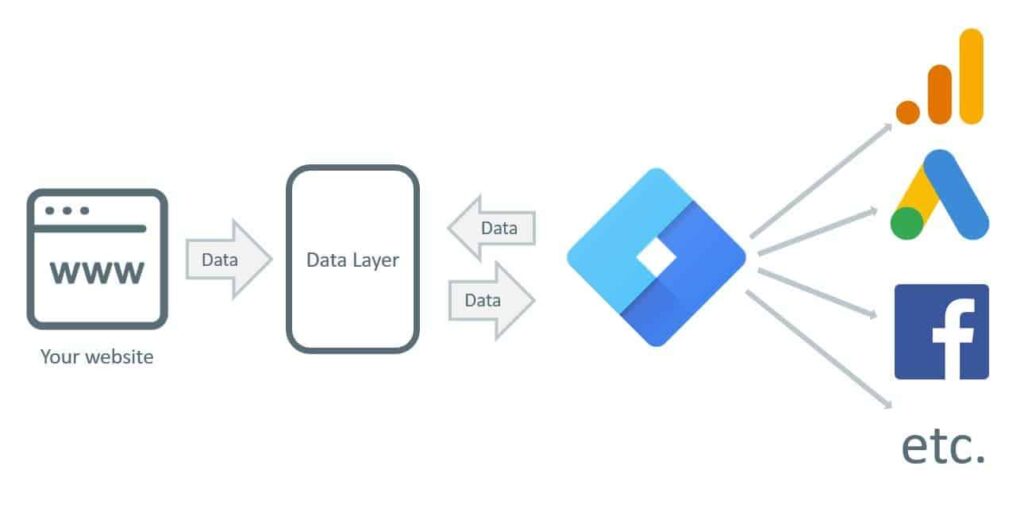
- Data Layer Variables: These are crucial. The “Data Layer” is a JavaScript object on your website where you can temporarily store data (e.g., product name, user ID, order total). GTM can read this data from the Data Layer and use it in your tags.
How the Pieces Work Together (The Flow):
- Website Loads: When a user visits your website, the GTM container snippet loads.
- GTM Communicates: The container snippet tells GTM’s servers to load the configuration (tags, triggers, variables) you’ve set up in the GTM interface.
- Triggers Listen: GTM starts listening for the events defined in your triggers (e.g., page views, clicks).
- Event Occurs: When an event happens (e.g., a user clicks a button), GTM checks if any defined triggers match that event.
- Variables Capture Data: If a trigger matches, GTM gathers relevant data using your defined variables (e.g., the text of the button clicked, the page URL).
- Tag Fires: If the trigger conditions are met, the associated tags “fire.” This means GTM injects the necessary code (the tag) onto the page, along with the data gathered by the variables.
- Data Sent: The tag then sends this data to its intended destination (e.g., Google Analytics, Google Ads).
Benefits of Using GTM:
- Agility and Speed: Marketers can deploy and update tracking without needing developer assistance for every change.
- Reduced Errors: Centralized management and built-in preview/debug modes help prevent broken code or incorrect tracking.
- Version Control: GTM keeps a history of all published changes, allowing you to easily revert to previous versions if needed.
- Improved Site Performance: Consolidating tags into GTM can sometimes lead to faster page load times compared to having many individual scripts directly on the page.
- Enhanced Data Collection: It makes it easier to track more complex user interactions and push relevant data into your analytics tools.
- Collaboration: Features like workspaces and user permissions allow teams to work together efficiently.
In essence, Google Tag Manager acts as a traffic controller for all your website’s tracking and marketing tags, empowering non-developers to manage these critical aspects of digital marketing effectively. Sources